Mixed LightingThis shoot was inspired by fortune tellers. Using my coloured disco ball set to spin I made it look like a sort of glass ball type orb thing.
Environmental / Creative lighting
This photo was about a kidnap victim. Using a light at the front to look like a door opening and one at the back for separation. No props allowed so I used light as per the brief.
Deep Etched Portrait part 1
The product to go with this photo will be a protein bar. I will be advertising Musashi.
Monday, November 11, 2013
Studio Products Progress Update
Alcohol
So I re shot my alcohol shot using Gossips Pink Moscato. I really liked the outcome of this shoot it was very fun especially after the first time I shot this alcohol didn't work out very well so I have the result of the re shoot I decided to do below.
So for this shoot I used 1 large soft box to the left hand side and a white reflector on the other side with a pink gel on the background, while an assistant poured wine into the glass.
Product of my choice - Sunscreen
For this shoot I used a bright light on the background ( blue cardboard ) and a large high soft box on the left hand side. I was trying to make the photo look like the sun was shining down on the product.
Home Appliance - Blender
For this shoot I used a soft box on the left hand side and reflector on the right really close to imitate the light being shone on the left hand side. This shot proved a bit difficult since there was a fair bit of glass. I originally wanted just a white background and table, but that made the glass hard to see. I then tried using black behind the glass but I didn't like how it showed all the imperfections in the glass. I settled on grey as it was in between and makes the glass stand out.
Thursday, November 7, 2013
Inspiration - Portraits
Just a few images I liked and gave me some inspiration for my studio portraits this semester.
Mixed Lighting....
Environmental lighting
I would say the first image was my main inspiration for my environmental lighting.
Used with this one to create the environment out of light...
Deep Etched Portrait
Mixed Lighting....
Environmental lighting
I would say the first image was my main inspiration for my environmental lighting.
Used with this one to create the environment out of light...
Deep Etched Portrait
Tuesday, October 8, 2013
Product Research
Inspiration
Just looking at some inspiration for product photography.These products have been lit from the left hand side with a large soft box and possibly a reflector on the right.
This photo I liked the idea of. The photographer has constructed a fake watch and photographed it on fire and then dropped the real watch into the photo using photoshop.
Studio Prac
Workshop
Test Shots, workshop prac - alcohol.
This was the intro to alcohol photography workshop. We had to photograph 3 different bottles and my top 3 are in the photographs below.
Glass isn't a particularly easy thing to shoot, but once you get the hang of it it isn't all too bad.
The most complicated thing to play with were the reflections in the glass of things around like walls, cameras, tables etc.
I ended up building a very very high podium for the first image which worked well in not having as many reflections so I decided to use it in the other two shots as well.
 |
| ISO 100, F11, 1/250 |
 |
| ISO 100, F11, 1/250 |
 |
| ISO 100, F11, 1/250 |
Sunday, September 1, 2013
Studio Research
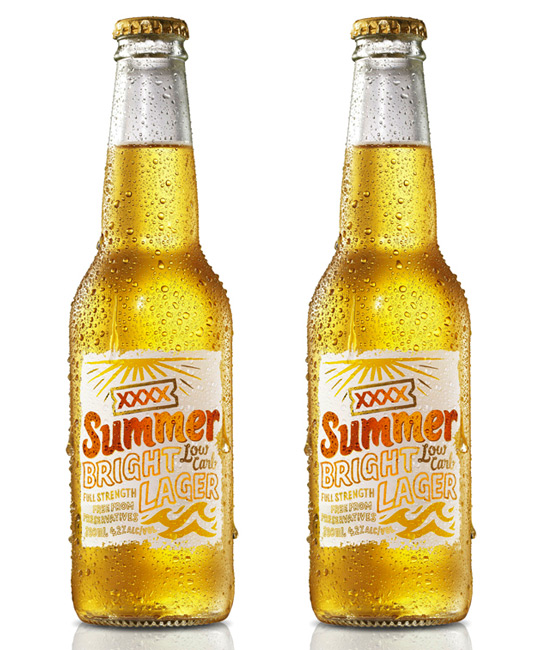
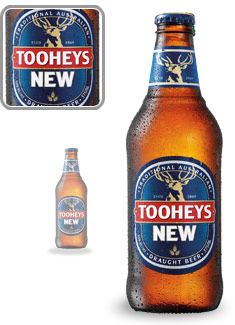
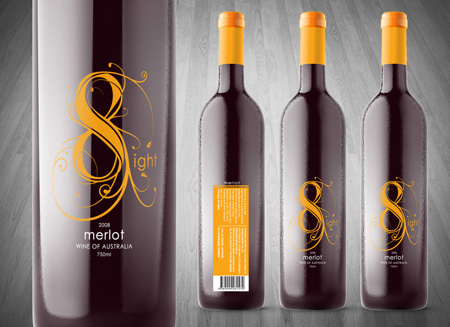
Task 5 - Beer and Wine Photography
Which of the photos are better?
2, 3 and 6
Why?
The lighting is much better in each of the chosen photographs. Also they look like they are the actual advertisements for the beer companies which means a photographer was paid to produce excellent images for the company to use to market their products.
The other photo's look like someone has sat the beer on the table grabbed what ever camera they could find threw some lights on it and snapped a few pictures. There seams to be no evidence of post production not even minor stuff.
Examples of Beer and Wine Photography I have found:
Electronic Devices
Examples
Many of these products below I think have been photoshopped. The one recurring lighting set up is having a corner of the selected product with a faded white triangle either this could have been photoshop or the studio walls being in the way and the photographers having to use the reflections to their best ability.
I think they have all been simply done but they work so well.
Studio Research
Task 4 - Tethering
Tethering is connecting your camera to a computer via usb to display real time action. When you take a photo with the camera while it is tethered the photo will be saved to the cameras memory card and also to a place you have chosen on your computer. You can view these photo's live using software such as Adobe's Lightroom, Apple Aperture, Phocus and many more. Tethering software is good for correcting exposure, focusing and showing previews of the work being done to coworkers or perhaps the client.
Adobe Lightroom
Incorporates tethering functionality
in its comprehensive RAW processing and photo management software. The
tethering feature is compatible with select Canon, Nikon and Leica
digital cameras. Here a list of supported compatible cameras.
A few of the many features include importing photos as they are taken
and loading them to a selected catalog. Lightroom offers access to many
of the camera’s settings directly from computer as well as instant
viewing, zooming, rating and tagging of shots. The ultimate benefit is
checking focus, lighting and composition in great detail. Available for
Windows or Mac.
Apple Aperture
Introduced tethering functionality with its 3rd software version,
allowing one to shoot directly to their Mac. Aperture is a
comprehensive photo management software, which includes image storage
and management, detailed metadata, customized presets as well remote
backup. Available for Mac.
Phocus
Is an free software package designed for Hasselblad cameras. Phocus
software provides all the power, performance and advanced tools that
photographers desire in an easy-to-use and attractive working
environment, making even the largest files simple to handle. Besides
the more common tethering features, Phocus offers scene calibration,
moire removal and camera configuration to name a few. There is also
Phocus Mobile which integrates an iPad or iPhone into the workflow and
Phocus Quick for one touch image preview.
Information from current knowledge and software descriptions from http://www.tethertools.com/plugging-in/software/
Monday, August 12, 2013
Studio Research
Task 3
This includes a review of previous theory and a simple research task for week 4.
1. Complete the following list of f-numbers (do not use 1/3 stops)
f1.0 f1.4 f2.0 f2.8 f4 f5.6 f8.0 f11 f16 f22 f32
2. In a given studio portrait situation where the subject is lit by one source and a reflector, if an incident light
reading of the lit side is f16 and an incident light reading of the side lit with reflected light is f1.4 then the
difference in illumination will be;
[a] 5 stops
[b] 6 stops
[c] 7 stops
[d] 8 stops
3. The difference in illumination described in question 2 above expressed as a ‘lighting ratio’ will be;
[a] 4:1
[c] 8:1
[c] 32:1
[d] 128:1
4. If the maximum output of a powerpack is 1200J, the output of the same powerpack when set on half power
will be;
[a] 1600J
[b] 1200J
[c] 800J
[d] 600J
5. If in the situation described above in question 4 an incident light meter is used to measure the output of the
powerpack set to maximum output and from a given distance is f22, the new f-number at the same distance
when the powerpack is set to half power will be;
[a] f22
[b] f16
[c] f11
[d] f8
6. In a given situation you are using two powerpacks to photograph a subject using multiple discharges, eg. 10 sequential discharges. One powerpack is set to a greater output level than the other. You need to decide which pack will be the master pack to be triggered from the camera and which will be the slave pack triggered either optically or via another method from the master.
Describe which pack will be the master and why.
The master pack would be the one with the higher output as it is closer to the camera and will defiantly trigger and also with its higher out put it will simultaneously trigger the lesser output flash since the light is stronger it will reach the triggering antenna on the lesser output pack. The higher output pack is also closer to the camera so if you were using a cable to trigger the flashes you wouldn't have to get such a big one to run through the entire set.
Saturday, July 27, 2013
Workshop 2
Studio Research Task 1
1. Describe the difference between Flash Guide Number and Flash Guide Aperture.
Guide Number refers to the product of the maximum flash-to-subject distance and the f-number of the aperture that will correctly expose film or a digital sensor with the specified sensitivity.
-
- GN = distance × f-number or GN = f-number at 1m at ISO 100 (used for portable flash)
- GA= f-number at 2m at ISO 100 (used for studio flash)
5500K
3. In the given situation below there is a subject that is lit by a light source from the left side and a
reflector on the right side. A light meter can be used to determine the level of illumination on each
side of the subject. That being the case if the meter indicated f8 on the lit side and f5.6 on the shaded
side the lighting ratio would be;
[a] 1:0
[b] 2:1
[c] 4:1
[d} 8:1
4. If the readings were f8 and f1.4 respectively what would the new lighting ratio be?
32:1 - dont even bother!
________________________________________________________________
________________________________________________________________
Subscribe to:
Posts (Atom)


